Hacking Into a 20 Year Old TiVo — Part 1; an Adventure in the TiVo Media File System and TiVo Video
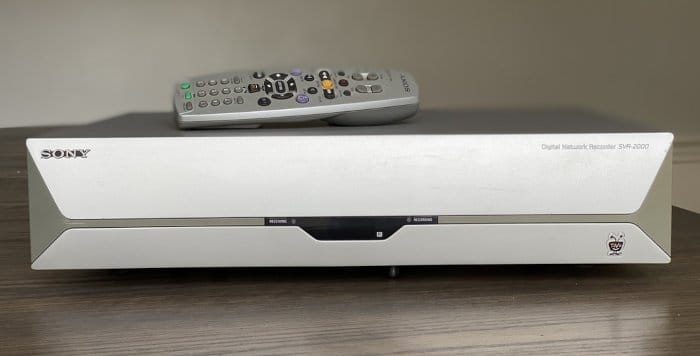
Table of Contents
I recently rediscovered my first, and only TiVo - a Sony SVR-2000, circa 2000. Pulling this TiVo from storage, the first and most obvious thing to do was connect it’s S-Video output to a RetroTink and fire it up.
Immediately I was transported back in time, reacquainted with TiVo. Program after program, 302 in total. Spanning from 2002 - 2006. It was amazing how familiar the interface was, the ease at which I could command that oval shaped remote. I immediately thought, how can I pull the video from this TiVo to save in a modern, more standards-based archival format. A video capture card would be the easy answer, but didn’t seem fitting for a device which was so cutting edge in it’s day. I needed the original source video, the bits on disk which brought me so much joy for so many years.
This is the guide for how it’s done.
At the time TiVo was all the rage, and for obvious reasons. It completely eliminated the choreography of “taping” the television programs you wished to save or watch at a later time. The tedium of manually programming a VCR, for a specific time for a specific channel, for a specific duration were things of the past. We were in the 2000s now, VCRs were a thing of the past!
I loved my TiVo, absolutely loved it. The ease with which you could record shows, pause live television, skip commercials (amazing) was a breath of fresh air to me. TiVo would learn your tastes, and automatically record programming it thought you would like (using up all available disk space), was just icing on the cake.
I was never into the TiVo hacking scene back in the day, frankly I had no idea of the existence of many of the projects underway then. The only modification I ever undertook was the expansion of the HDDs serving TiVo, replacing the stock 30 GB drive, with two monster 146 GB drive, taking my recording capacity up to 300 (!!) hours.
I used my TiVo up until around probably 2006, shutting it down for good when the availability of HD television came around and TiVo-like features in my set top box finally pushed me to pulling the plug for good.
Software Prerequisites
This guide is assuming that you have access to, and are comfortable with a Linux-based workstation. Familiarity with a Linux shell and command line will help tremendously. Everything we’re doing here is being done on a Linux machine.
Additionally we’ll be using:
- VirtualBox
- Debian Buster (in a VM)
- GNU Ddrescue
- MFS-Utils
- FFmpeg
Hardware Prerequisites
- Hard disks from a TiVo Series 1 device (Philips HDR110, HDR112, HDR212, HDR312, HDR612 or Sony SVR 2000)
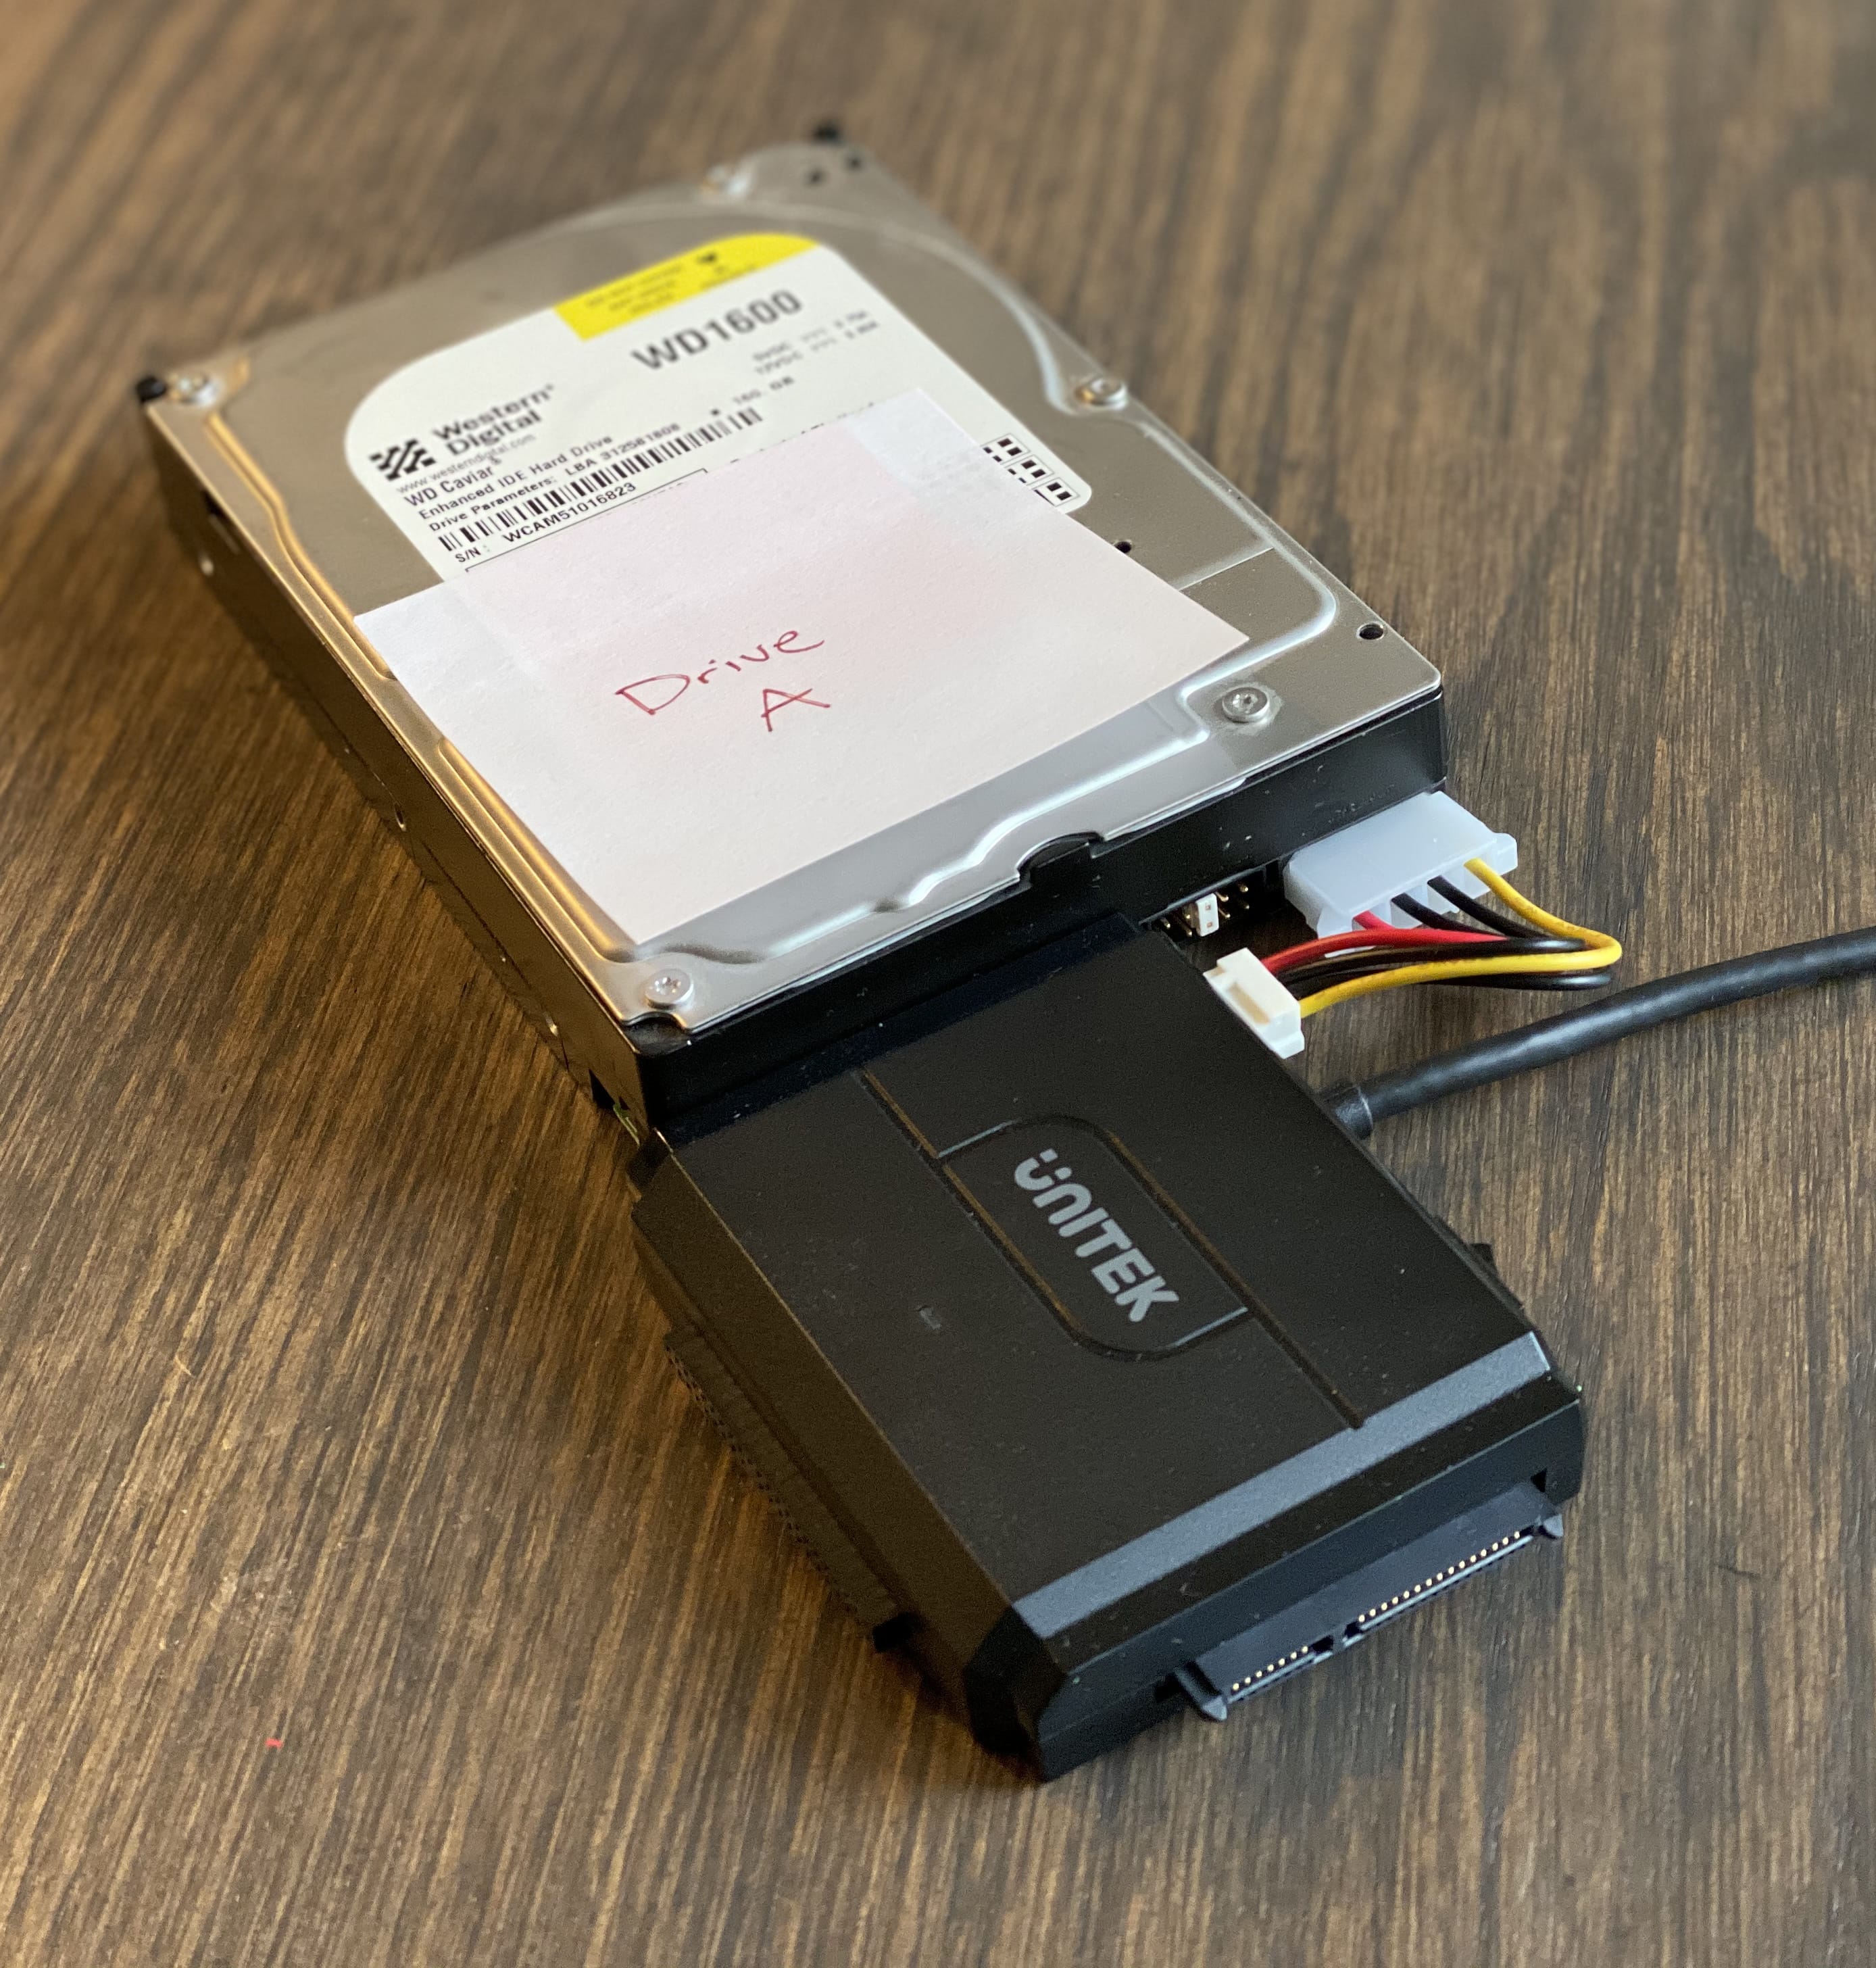
- A IDE interface adapter. I’ve had great success with this IDE/SATA -> USB3.0 adapter
- Enough free disk space to hold 2 to 3 copies of your TiVo’s hard disk(s). If you have a single 30 GB drive, you should have ~60–90 GB free and available on your Linux workstation.
Methodology and Approach
In working through this project, it’s many false starts, dead ends and retries I wanted to ensure that I did everything possible to preserve the data on my TiVo. My process for working with data from the TiVo reflect this, data preservation above all else. When working with older equipment, and especially older hard disks, always assume they’ll never spin up again.
We’ll be working from an identical virtual copy of the TiVo’s HDDs, thus minimizing activity on the original disks. If I screw up, no problem, start again.
Getting access to the TiVo drive(s)
You will need a Linux workstation to image the TiVo hard disks, and we’ll be using that same Linux workstation throughout this endeavor.
The first step here is to remove the hard disk(s) from your TiVo. To do so, you’ll need to open the case by removing the 3 screws from the back of your TiVo’s case, which then allows for the lid to be slid back and removed.
All stock Series 1 TiVos will have a single hard (known as Drive A). If your TiVo has been upgraded (like mine) you may find two drives installed. Regardless of the number of drives, you’ll need to remove all of them from the TiVo. This should be straightforward, removing the two screws which secure the drive cage to the case. Assuming you’re using the IDE adapter listed above you won’t need the IDE or power cables, so you can leave those connected.
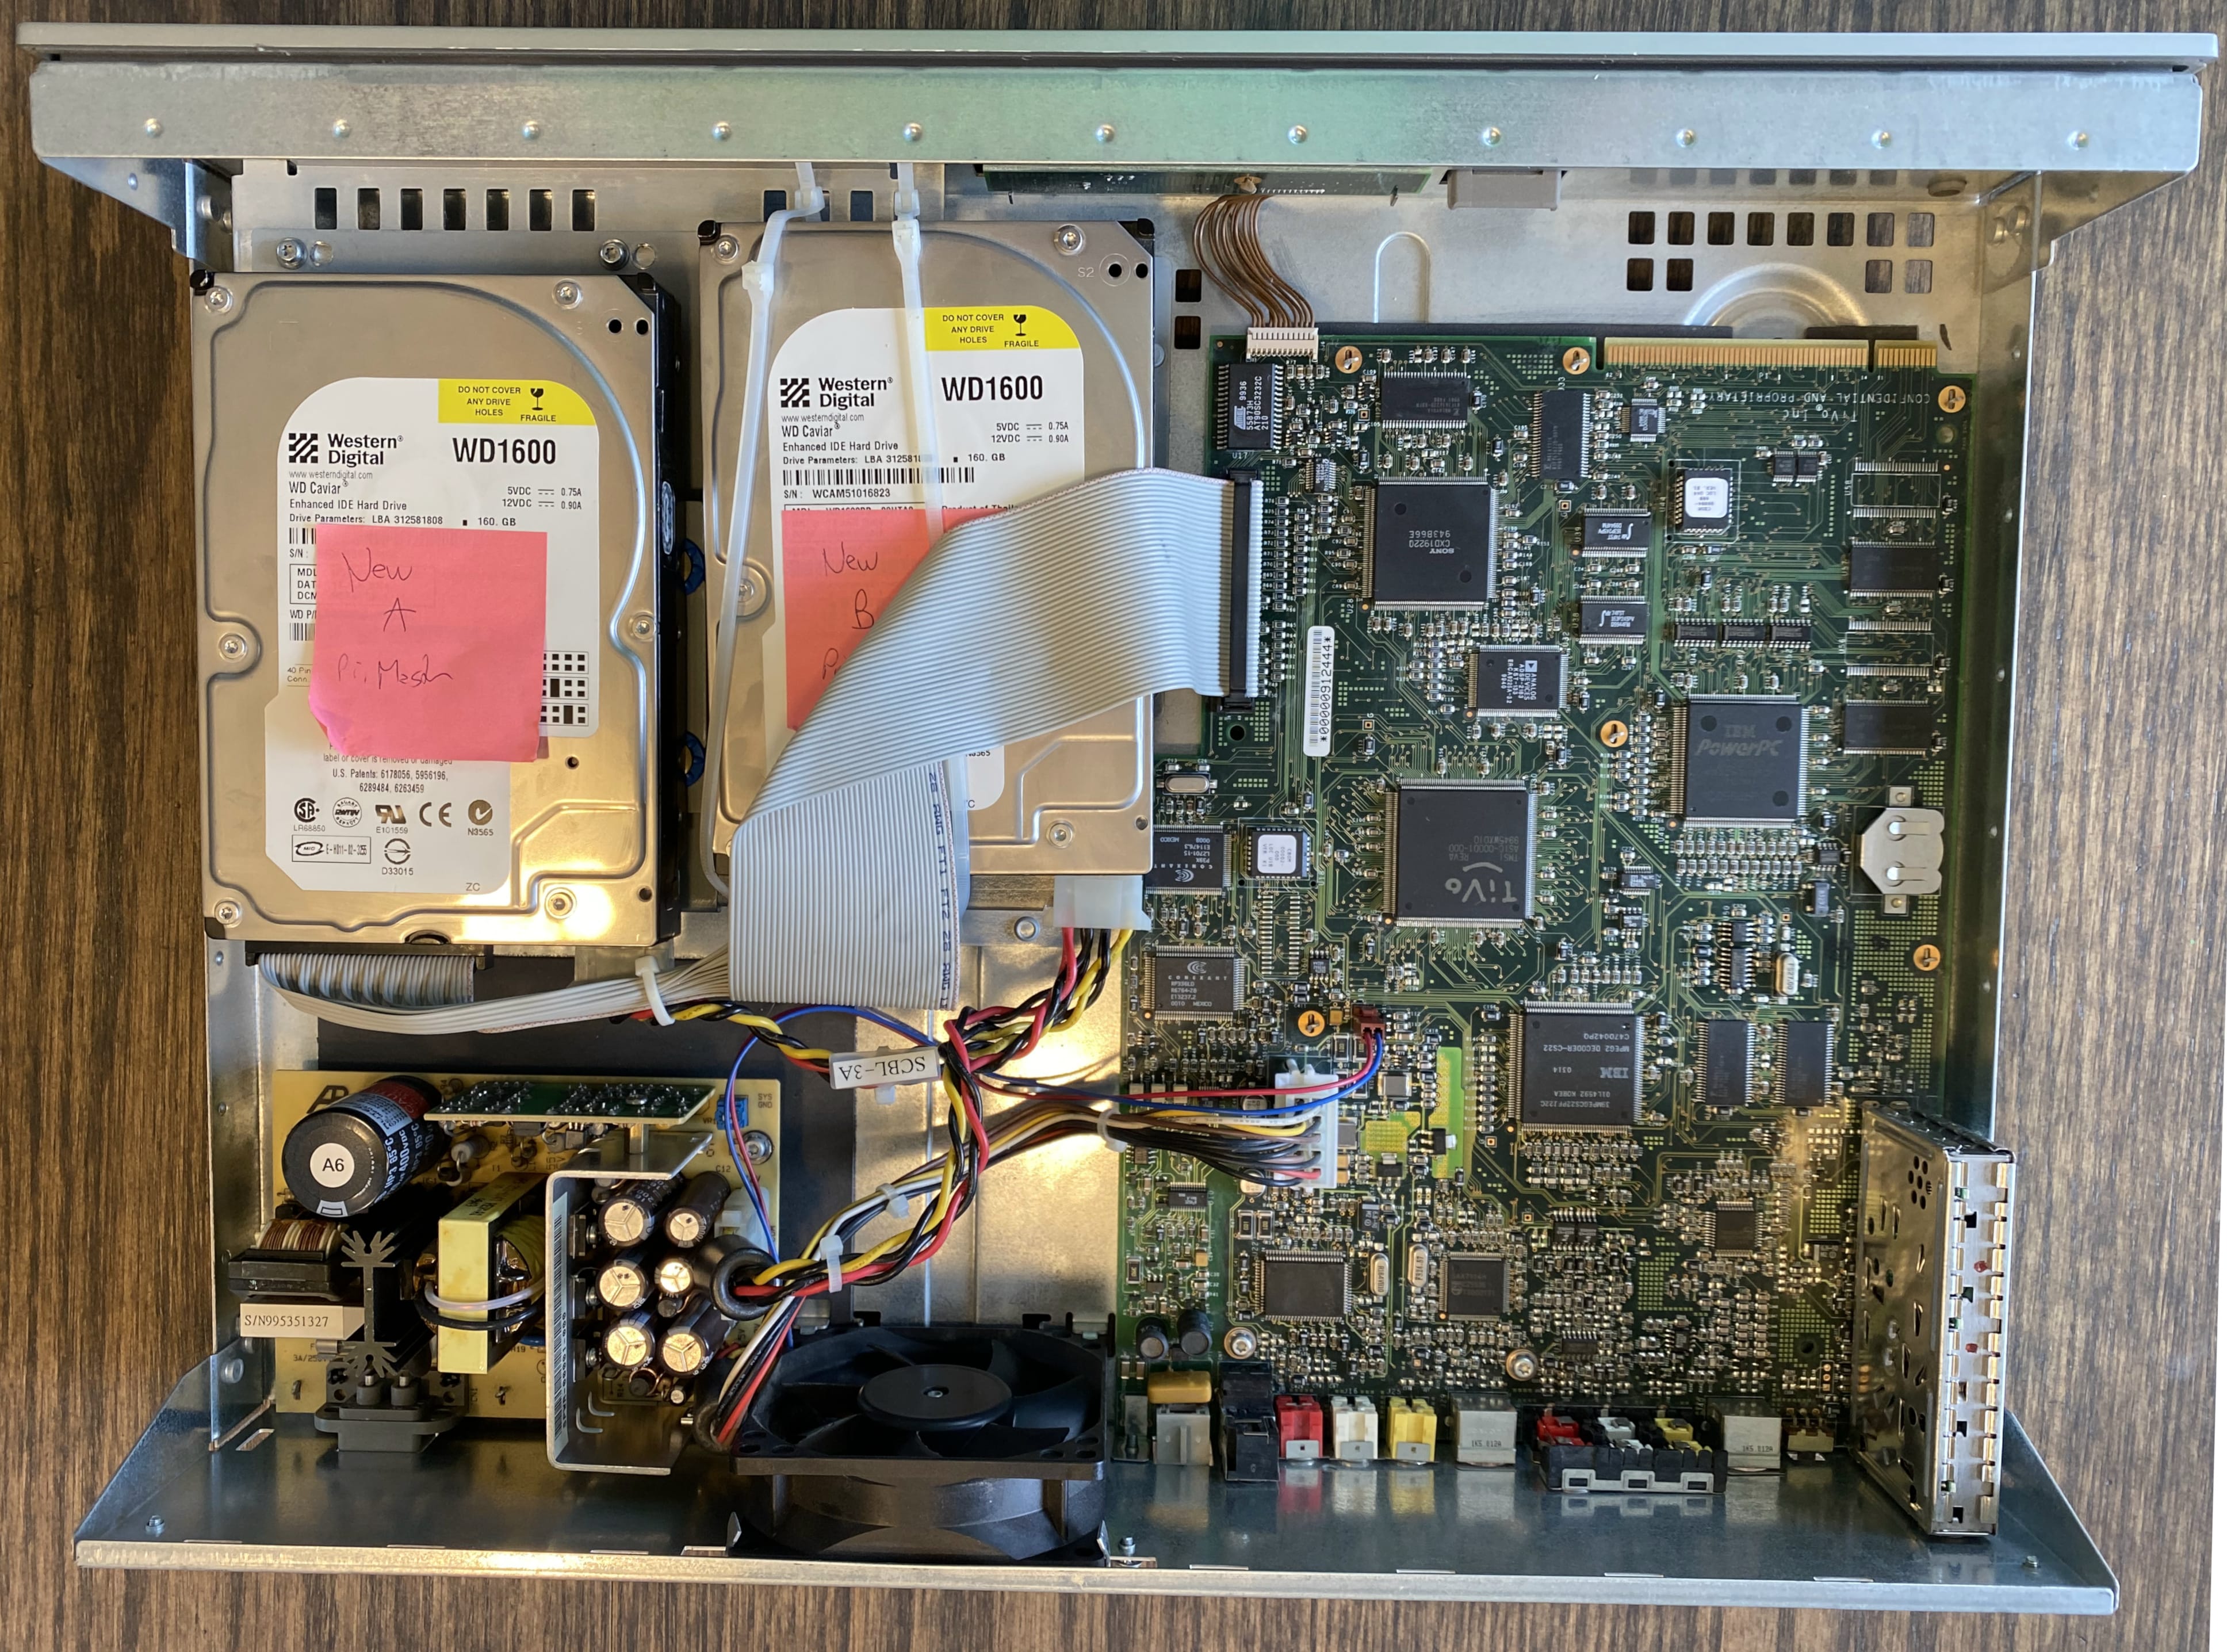

TiVo defines the Master disk as “Drive A”, and if present the Slave disk as “Drive B”. If you do have multiple disks in your TiVo ensure they’re labelled as Drive A and Drive B. A post-it note on the drive cover works just fine for this.
If you’re not entirely sure which is Drive A and which is Drive B, look at the jumpers on the hard disk. The master disk is Drive A, the slave Drive B.
Once your drive(s) have been removed from the case, connect Drive A to your IDE adapter, connect the IDE adapter to your computer, and power up the drive.
At this point if all goes well, you’ll here that familiar sound of a hard disk spinning up, initial drive seek and high-pitched whine that says we’re ready to go!
Creating an Image of your TiVo drive(s)
Open up your Linux terminal, and at the prompt enter sudo fdisk -l. You will see a listing of all disk partitions for your entire machine. You are looking for a disk probably labelled /dev/sda or /dev/sdb, which appears to have no valid partitions, and is the exact size of your TiVo’s hard disk drive.
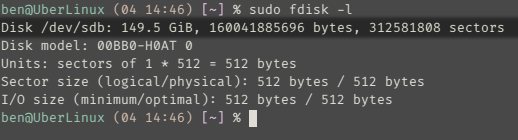
This is your TiVo’s hard disk, which does have many partitions, none of which are currently readable by your Linux workstation. This is totally expected, and not a concern.
If you’re not seeing your TiVo drive, power down the disk and check your connections. Ensure there’s no bent pins on the disk drive itself, and the adapter is connected properly to your Linux workstation. If you have another (non TiVo) drive, try connecting that to the IDE adapter to validate the adapter is functioning.
Document your TiVo drive’s device name (e.g. /dev/sdb), as you’ll need it throughout this process. The rest of this process assumes you’ve defined a Bash variable of $TIVO_DRIVE to reference the TiVo drive:
$ export TIVO_DRIVE="/dev/sdb"
I’ve had great success in creating disk images with GNU Ddrescue, which is a purpose built data recovery tool:
It copies data from one file or block device (hard disc, cdrom, etc) to another, trying to rescue the good parts first in case of read errors. The basic operation of ddrescue is fully automatic. That is, you don’t have to wait for an error, stop the program, restart it from a new position, etc. If you use the mapfile feature of ddrescue, the data are rescued very efficiently, (only the needed blocks are read). Also you may interrupt the rescue at any time and resume it later at the same point. The mapfile is an essential part of ddrescue’s effectiveness. Use it unless you know what you are doing.
Using the package manager provided by your Linux distro, install the GNU version of ddrescue (why GNU Ddrescue):
$ sudo apt-get install gddrescue
At ddrescue’s most basic, you need to provide a source, destination and mapfile to start the imaging process:
$ sudo ddrescue ${TIVO_DRIVE} tivo-disk-a.img tivo-disk-a.mapfile
If you’re lucky, this is all that’s needed to get a complete image of your TiVo’s hard disk. It’s quite likely that you will need to utilize some of ddrescue’s more advanced features to obtain a complete image. The ddrescue manual is very comprehensive and well written, so I suggest reading through that before moving on to ‘advanced’ recovery.
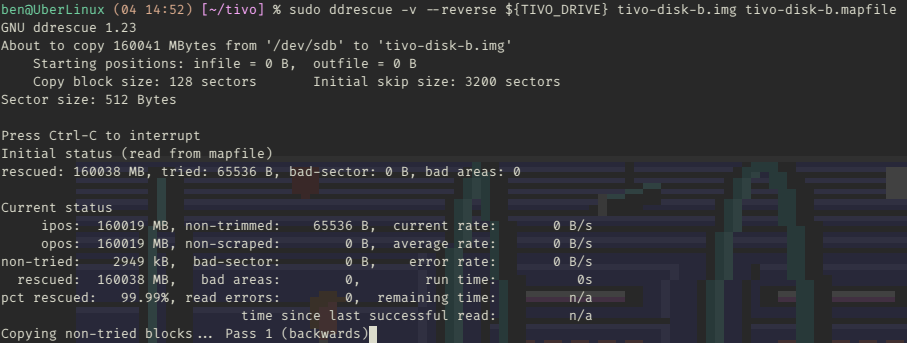
Generally I’ve had pretty good luck in using the --reverse, and --idirect features of ddrescue to deal with problematic areas of a hard disk. If your disk image is hung trying to copy some area of the disk, abort that copy and try again with --reverse. You may also have to fiddle around with --input-position to temporarily work around bad areas in the disk:
$ sudo ddrescue -v --reverse --sector-size=512 --idirect --input-position=155015000000 ${TIVO_DRIVE} tivo-disk-a.img tivo-disk-a.mapfile
Don’t be surprised if this imaging process takes days. Yes seriously, days. It took me almost a week of trial and error to get a complete image from my Drive B. Your patience will be rewarded.
If you have a second drive, complete the same steps to get a disk image for Drive B.
Once you have your disk images, you can disconnect the TiVo hard disk from your Linux workstation and reinstall them back into the TiVo.
Making that disk image useful, a lesson in endianess.
TiVo Series 1 devices leveraged an IBM PowerPC 403 series processor running at a blazing 54 MHz. IBM PowerPC chips leveraged big-endian byte order, which placed the most significant byte of data at the memory location with the lowest address.
By contract, x86 CPU architectures are little-endian, which is the exact opposite. Little-endian places the least significant byte of data at the memory location with lowest address.
Simplifying, your TiVo writes data as 12 34 56 78, and your modern (likely x86) PC writes data as 78 56 34 12. Hello versus olleh, TiVo versus oViT.
So, why’s this important? In short, the data stored within your TiVo disk images is effectively useless on an x86-based PC. Thankfully, we have a straightforward way of swapping these bytes in our disk image using a Linux utility, dd.
For each of your disk images (you may just have one), run the following command:
$ dd if=tivo-disk-a.img of=tivo-disk-a-converted.img conv=swab status=progress
This will create a copy of your original disk image, with each of the input bytes reversed, thereby enabling the data on this disk to be read with a x86-based PC. You’ll be working from the converted disk images from this point forward, and it’s your choice to keep to delete the original ddrescue images. If you have the spare disk space, keep them around just in case you need to start over somewhere.
To Be Continued…
In Part 2, we’ll put those disk images to use, get them setup in Virtual Box, and leverage some 15 year old software to explore the TiVo’s filesystem contents, and eventually extract some video!